I like to build stuff – both in terms of software and hardware (mostly Arduino-related). This page is an overview over a few of the projects I have worked on.
Mobile Cloud Gaming: Stream-A-Game (since 2013 and ongoing)
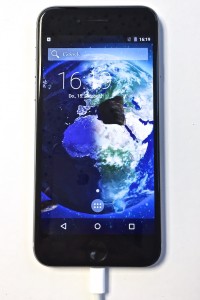
Cloud Gaming is a hot topic: When players want to play the latest games, they typically also need to own pretty new hardware. With Cloud Gaming, instead of having the player’s own device bear the burden of executing the game and running the complex computations to render the visual output from the game, all that is done on a powerful server in the cloud. The player’s own hardware just has to send input commands to the server and receive and display a live video stream – something even old devices and ordinary television sets can do. With the “Stream-a-Game” project, I built such a streaming system for mobile (Android) games based on open source components such as the Android-x86, GamingAnywhere, and VirtualBox or XenServer (as Cloud environment). And yes, with this system it’s possible to “run” Android on an iPhone! 🙂
Freifunk: A community-driven wireless mesh network (since 2003 and ongoing)
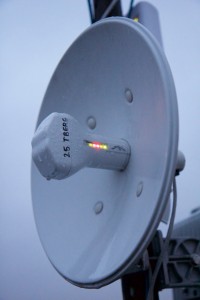
 With Freifunk firmware, off-the-shelf wireless routers don’t just broadcast their own signal, they also forward data for their neighboring Freifunk routers. This allows the Freifunk community to build wifi networks which cover entire cities in a highly decentralized manner. In Berlin we have such a metropolitan area wireless community network in which high buildings, interconnected via directional wifi links, form a “back bone”, and hotspots on the street level allow everyone to access the network and use it’s resources (such as free Internet access). As part of the community, I operate multiple directional wifi connections and run a hotspot covering a nearby public park. As we take data protection very seriously we do not keep any logs which might identify users of the network, but we monitor how much traffic flows through the network – and it is quite a bit. 🙂
Arduino: LatencyProbe (2015)
 Together with my colleagues at Quality and Usability Lab Jan-Niklas Antons and Richard Varbelow, I built an Arduino Pro Micro-based tool to accurately and automatically measure the feedback latency of interactive devices with touch or mouse/keyboard-based input. We used this tool on various iOS and Android handsets and tested Cloud Gaming delays using it. Since we learned so much using this tool, we decided to write a paper about it.
Arduino: USBLatencyInjector (2015)
Work in progress
Arduino: Nachtlicht (2015)
 Kids don’t seem to like it when it is absolutely dark in the night. Instead of buying one of these not-so-good-looking devices, I figured I’d build my own… not yet so good looking device. 😉 It is a cheap Atmega 328PU chip powered directly by three AA (eneloop) rechargable batteries with a light sensor and a warm-white LED. The setup is trimmed for power-efficiency: Obviously, lighting the LED during daytime is a waste of energy. But there are a few more easy hacks to keep power usage low – such as only briefly powering the photo resistor to measure ambient light levels. The software furthermore monitors the charge level of the batteries and warns before that gets too low by brightly flashing the LED during day-time. With these tweaks, the setup lives more than two weeks on a single charge of the batteries.
Arduino: 32 channel DMX-controlled dimmer for 12V lamps as part of a wedding light installation (2014)
 For my wedding, we decorated a nice and romantic barn a bit north of Berlin to have a great party. Besides using lots of other professional lighting equipment, I built a light installation consisting of 29 light spheres ‘floating’ in the the middle of the hall. Each lamp consisted of a paper sphere with a 12V 10W halogen lamp in the middle.
  These lamps were connected through abused network cable (that was the cheapest) to the central controller which at its core had an ATMEGA 328PU SoC (Arduino on a breadboard), driving a total of 32 MOSFETs which dimmed the lamps using PWM. To control the lamps, the self-built board was equipped with a DMX (aka RS485) interface and connected to the same DMX control bus as all the other installed light equipment. The 12V power was supplied by old PC power supply – so all in all it was a work intensive but comparatively cheap and fun installation which worked like a charm.
MESO IBox Touch (2009-2012)
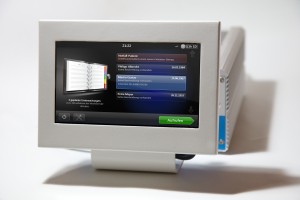
 IBox Touch is a medical product to connect imaging devices such as ultra sound units or endoscopes to modern DICOM systems in hospitals or doctor’s offices. IBox digitizes images and video sequences from these imaging devices, combines them with patient and study data and sends them to the central DICOM PACS. It even allows medical professionals to remotely monitor the progress of a study in real time by streaming the video picture over a network.
For this embedded device, I built the entire software stack using Microsofts .NET framework and particularly WPF around an existing C++ video capture framework and designed a friendly and intuitive touch user interface, which stood out amidst all the grey and carelessly designed interfaces you see in hospitals – and it continues to do so!


